Installing a vinyl fence yourself can provide much-needed privacy, keep the family dog corralled, and add to the aesthetic appeal of your home for many years to come. You may even save some money in the process—but only if you follow the proper installation procedures.
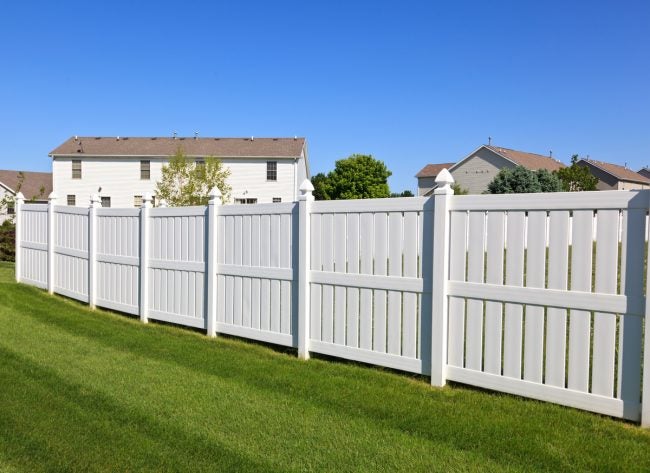
Photo: istockphoto.com
Although few do-it-yourselfers relish the prospect of a weekend spent mixing hundreds of pounds of concrete and digging numerous post holes, most can handle a vinyl fence installation. In fact, according to the data collected by HomeAdvisor and its network of service professionals, these handy homeowners can save up to a third of the expense of a new fence by replacing professional labor costs with a little elbow grease.
Before diving into a project unprepared, consider the most common pitfalls. Overlooked building regulations, poorly set posts, and insufficient prep work can create problems that quickly eat into those savings and shorten the life of a fence. If you want your vinyl fence project to stand as a testament to your DIY abilities for a long time, you’ll need to make sure you follow some important dos and don’ts.
DO prepare the yard.

Photo: depositphotos.com
Begin prepping your yard for the installation by calling 811 (or visiting call811.com) to schedule times for your utility companies to visit. They often bury lines around your home, so you’ll need representatives from each to mark the location of said lines. The process takes about a week, but don’t skip it. Digging without knowing what’s below is dangerous. Hitting a utility line with a shovel can result in serious injury or even death.
If you plan to erect the fence along the edge of your yard, verify the property line by checking your deed or by visiting the local assessor’s office. While this step may seem inconvenient, it’s certainly preferable to digging up a fence you inadvertently built on your neighbor’s property!
Once you’ve located the utility lines and established your property line, mark the perimeter of your fence with a can of brightly colored spray paint. Finally, clear away any rocks, plants, or debris that might be in the way.
DON’T install posts too close together.
Vinyl fencing will bend without breaking, allowing it to withstand high winds and minor impacts. This flexibility depends on proper vinyl fence installation. Install the posts too close together, and the vinyl fence panels will fit so tightly that they become rigid. This limits the vinyl’s ability to bend, increasing the likelihood that high winds or an errant object will damage the fence. You can avoid this issue by spacing the posts a full panel’s width apart and avoid having to cut a panel to a smaller size wherever possible.
Also, keep in mind that, like wood, vinyl fencing also expands and contracts. While wood swells when exposed to moisture, vinyl expands during hot weather. If you fit the fence panels too tightly between the posts, there will be no room to accommodate this expansion, which could result in warping or buckling. To prevent this from happening, each panel should have a few millimeters of wiggle room when installed.
DON’T dig shallow holes.
Your fence is only as strong as the posts holding it up, so set each post securely in the ground—especially if you are in an area with high winds or soft soil. Posts with shallow holes are more likely to eventually lean under the weight of the fence or even blow over altogether in extreme weather.
So, how deep should fence posts be exactly? Although depth requirements vary depending on soil conditions and climate, you generally want a third of the post length to be in the ground. You also need to account for an additional 6 inches of gravel, which provides a base that will help drain water away from the post. So, if you’re planning on setting a post 3 feet deep, you’ll need to dig a hole that is 3 feet 6 inches deep to account for the gravel layer.
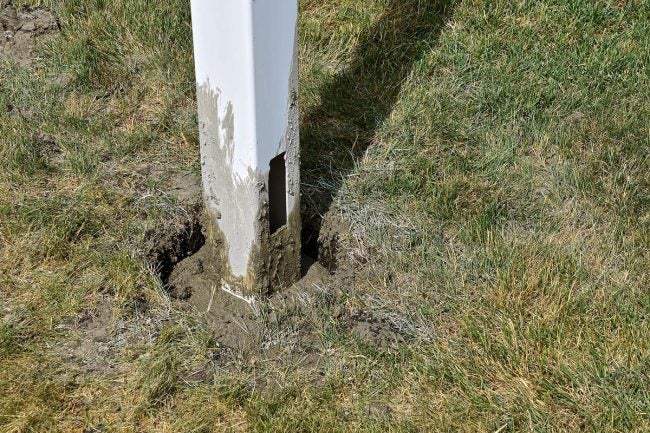
Photo: depositphotos.com
DO install end and corner posts first.
Lining up the posts accurately is critical to a successful vinyl fence installation. Given how difficult the process of installing posts can be, you don’t want to have to dig out a post and reinstall it because you didn’t correctly align it with the other posts. Eliminate the guesswork by installing the end posts and corner posts first. Once in place, stretch a string line between the posts, making sure the line is taut. Then use the string line as a guide for all of the posts in the middle.
DON’T neglect a level.
While you may want to save time by eyeballing whether or not your posts are level, don’t do it. The only accurate way to determine if each post is straight in the ground and even in height with the other posts is to use a quality level.
After installing a post and before the concrete has set, check that it is plumb by placing a level on two adjacent sides or by using a post level. To ensure the posts are even in height, run a tight string line between corner posts and end posts. Use a string line level or bench level to make sure the line is level, then check to see that each post in between meets the string line, adjusting the post heights where needed.

Photo: homedepot.com
DO install one panel at a time.
Compared to the laborious process of setting posts, installing the vinyl panels is pretty easy: It typically involves snapping pieces together by hand with minimal need for tools. While this process might bring back memories of those snap-together model kits you built as a child, don’t get lulled into thinking you can speed through this portion of the vinyl fence installation.
Install one panel at a time, and keep your trusty level handy. Check to make sure each panel is level once installed. If your vinyl fence panels are in individual pieces, check the top and bottom rails as you connect them to make sure each is level. Level the panel as needed by hammering the high post lower before the cement fully sets. Correcting the fence as you go is much easier than attempting to level an entire fence later after the concrete has had an afternoon to cure.
DON’T hammer the material.
In many respects, vinyl is more durable than conventional wood fencing. Even so, it does not hold up well against blunt force impact. While it would be inaccurate to label vinyl fencing fragile, a miscalculated hammer swing can easily crack vinyl or even punch a hole in it. You can limit the use of one while installing a vinyl fence, but you can’t avoid it altogether. You need a hammer to lower posts that do not align properly with other ones.
There is, however, a safe way to do this. Instead of directly hammering the post, use a 1×4 or 2×4 block as a buffer. Rest the block on top of the post, then strike the block to drive the post deeper. The block will blunt the force of the blow while distributing the impact more evenly over the vinyl, preventing it from cracking.
DO check local regulations.
There’s nothing worse than completing a major fence building project only to receive a letter a few weeks later demanding you remove it because you’ve violated local zoning laws or your homeowner’s association’s covenants. (For example, many municipalities limit fence heights to 4 feet in the front yard and 6 feet in the backyard.) Do yourself a favor, and check all local regulations before proceeding with your project. This may mean submitting your plans to the HOA for approval or checking local zoning laws to ensure the new fence will be compliant with city regulations—it could save you a lot of grief and money in the long run.
tinyurlis.gdv.gdv.htclck.ruulvis.netshrtco.detny.im
مقالات مشابه
- شرکت صادرات و واردات کالاهای مختلف از جمله کاشی و سرامیک و ارائه دهنده خدمات ترانزیت و بارگیری دریایی و ریلی و ترخیص کالا برای کشورهای مختلف از جمله روسیه و کشورهای حوزه cis و سایر نقاط جهان - بازرگانی علی قانعی
- After Nine-Week Decline, VA Sees Spike in COVID Cases
- ↑ C21 Drama Award Finalists Announced
- و می گوید آن را نمی خواهد متوقف کردن استفاده از دارو اثبات نشده در دامپزشکان در حال حاضر
- یک کلمه: اسباب بازی
- توصیه رایگان در اسباب بازی
- آشنایی با پنل تنظیمات مودم های 3G و 4G LTE ایرانسل - Shayano
- 10 روشها ایجاد بالا مواد شیمیایی با کمک از شما سگ
- همه چیز در مورد نصب دکل مخابراتی و تجهیزات مورد نیاز => دکل مخابراتی
- ایده ها، فرمول ها و میانبرها برای پودر میکرونیزه کربنات کلسیم